Installing a Modular Office | Modular Office Installation
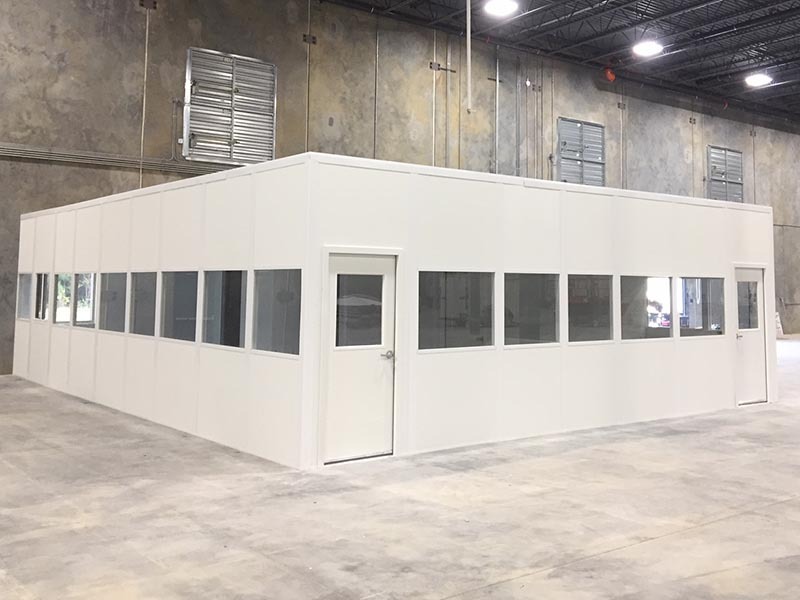
Installing a modular office in your facility is a great way to quickly provide quality office space in your facility. By producing the wall panels in our own plant, you can have your own modular office at a moment's notice. The only thing left to do is putting it together, and that's what our post is about today. Installing a modular office system, using steps from our very own install guide.
1. Site Prep
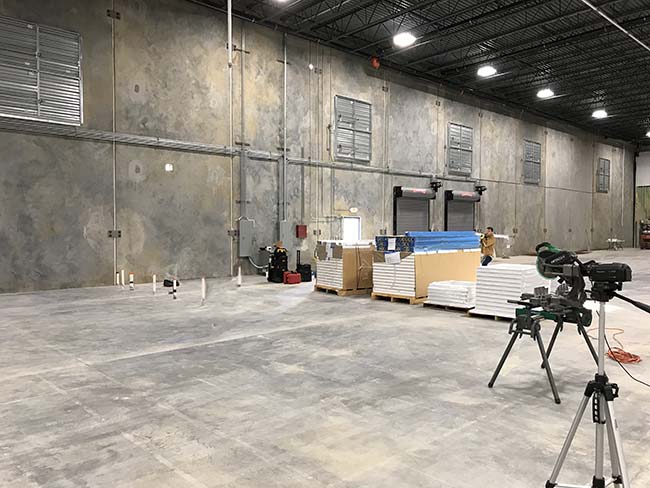
The first and possibly most important step in your modular office installation is preparing the area in which the office will be installed. The very first step in making your modular office project a success is ensuring the project site is cleared and cleaned. Having good material organization leads to quicker install times and reduces the chance of issues later down the road. This is also a good point to go over your team's safety measures. Make sure all installers have their safety headgear, gloves, and OSHA approved safety glasses.
2. Building Layout
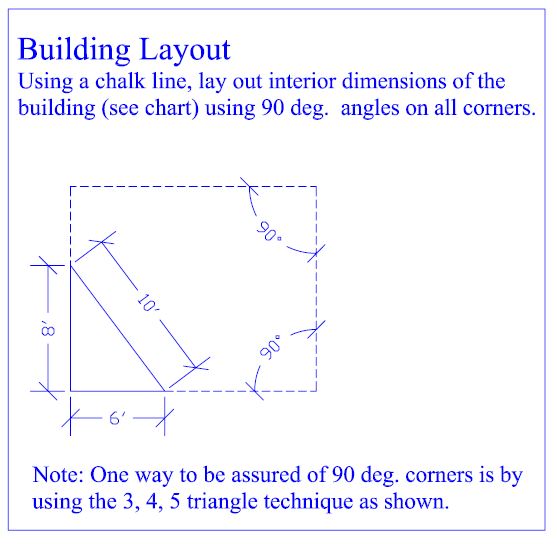
Using a chalk line, lay out the interior dimensions of the modular office building, using 90-degree angles on all corners. Double check to ensure the layout matches the dimensions on your drawing. This can be done by taking a measurement of the distance from corner to corner and comparing it to the corresponding corner to corner measurement. If the numbers are equal, your layout should be square. Additionally, you can use the three, four, five technique for right triangles to ensure your corner is at a 90-degree angle.
3. Base Channel
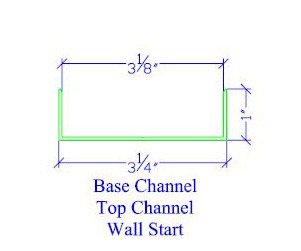
Next, place your base channel along with your modular office's chalk outline. Included in your Panel Built office materials will be the required fasteners to attach the channel securely to the floor. Using 1/4" Nylon anchors, fasten the channel to the concrete floor with fasteners spaced every 18" on center. When fastening into a wooden floor, a 10" Phillips pan head screw will be used.
4. Starting Your Wall
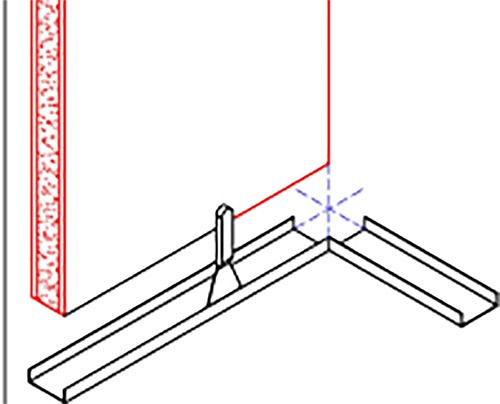
When starting a 4-wall system, begin in the corner, install the first panel with the edge even with interior corner point. The panel can be guided into the base channel using the putty knives. Plumb panel in both directions, and secure to the base channel with #10 x 1 Yi" Pan Head Self Drilling Tek Screws. 2 or 3 Wall Installation: When starting from an existing wall. Attach wall starts to existing wall using either nylon anchors or # 10 Pan Head screws, depending on the pre-existing wall material. Ensure that wall starts are plumb prior to final fastening. Place panel into the base channel and slide edge of the panel into wall start.
5. Corner Posts
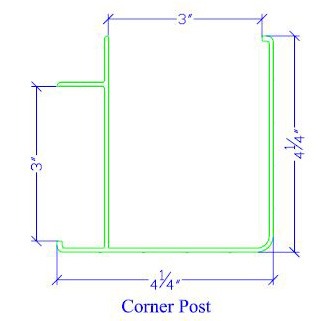
With your first panel installed into the corner of your building, install a corner post over the edge of the panel. Place your panel into the short end of the post to account for wall growth later on. The corner post is designed to allow 3" of panel growth, if necessary. You may want to use the putty knives to guide the corner post onto the panel. Fasten corner post, top, and bottom using # 10 x 1 Yi" Pan Head Self Drilling Tek Screws.
6. Continuing Your Wall

With the starting corner panels in place, assemble the binder post dividers using the binder post hat channels. Secure the hat channels together using #12 x 3/4" hex head self-drilling screws. Leave two binder post unassembled. (These posts will be assembled as the last wall panel is put into place.) Secure the hat channels together using 12x3/4 " hex head self-drilling screws. Leave (2) binder post unassembled. Do not install the binder post snap-in covers until all panels are in place and wiring is installed. Reference the electrical details for methods on installing the snap-in covers. To continue the walls place one assembled binder post over the edge of the corner wall panel. Then slide the next panel into the edge of the binder post. Note that 1/8" space should be left between the panel edges and the binder posts. Stand the final panel into place in the base channel. Make certain that there is a 3" gap on each side of the panel. Then install the (2) unassembled binder post onto each side of the last panel. Maintain your 3" gap between panels. Finally, after corner panels have been installed and checked for plumb (in all directions), place top channel in position over wall section. Fasten in place with #10 x 1 71" Pan Head Self Drilling Tek Screws.
7. Roof Decking

In most installations, the steel roof decking will span the entire roof area, if not, please refer to the enclosed plans for a detailed description of placement of interior roof supports. Position Steel Roof Decking on leading edge of the buildings with the flat side facing up. Position panel with the "short edge" being flush with both of the outside edges of the Top Channel. Install the binder top flashing( see detail) under the steel roof decking. This flashing will act as a trim piece to conceal the roof decking. The "long edge" is flush with the interior wall when squareness is assured. Fasten through Roof Decking into the Top Channel with # 12 x 1 1/4 Hex Head screws, starting in the corner, and proceeding along the "long edge" approximately 12" apart.
Ensure Squareness before fastening.
When the first decking panel is secured, attach the second and "mate" the outside edges to make an overlapping joint. Attach the joint from the inside up through the 2 joining panels approximately 12" apart with #12 x 1 1/4 Hex Head Head screws. Continue attaching roof decking panels in the manner described, until all roof panels are in place.
8. Modular Office Wall Molding
First, we are going to be installing the wall molding at the top of the panels. Mark the height desired for the ceiling. Add the height of wall molding and mark a level line around 3 walls and snap a connecting chalk line on the 4th wall. Screw the wall molding to the wall studs. Using!" Grabber Screws with 1 screw for every 12".
9. Drop Ceiling Install

Snap the chalk line for the main beams 4' apart (A). Screw in the wire fasteners 4' apart and wrap the hanger wire securely around itself at least 3 times (C). Add extra wires for light fixtures with one at each corner of the light. Additional hanger wires may be required depending on your area's seismic activity.

Next, attach guide strings to the bottom of the wall molding with a main beam guide string at border panel distance (A) and a cross tee guide string at corner panel distance (B). Strings must meet at 90-degree angle.

Install first Main Tees (A) at Guide (B) trimmed end on Wall Molding and other end hung on the pre-bent wire. To span the room, connect the main tees every 12' and support the main tees with pre-bent wire. Trim end of first Main Beam (A) so that a Cross Tee slot on the Main Beam aligns with Cross Tee Guide String.

Start at Guide String and install all 4' Cross Tees between Main Tees at 2' intervals (A). For 2'x2' panels, install the 2' Cross Tees at the midpoints of 4' Cross Tees (B). Install some middle ceiling panels to square up the grid. The first Main Tee must be aligned with the Main Tee Guide String. Measure distance from the first Main Tee to the wall at the Cross Tee. Trim the cross tees and install. On opposite side of the room, measure, trim, and install a Cross Tee (D). Repeat process, alternating sides of the room, until all Cross Tees for border panels are in place. Remove Guide Strings. Finally, drop your ceiling panels into place by lifting the panel at an angle through the 4' grid. Make sure the installers hands are clean. Trim the border ceiling panels, cutting panels face side up and using the straight edge.
10. Modular Wiring
If you need help finding space solutions in your warehouse or manufacturing facility, contact us at info@panelbuilt.com, or Request a Quote!
